Bumper Repair in Montreal – 6 steps to DIY at home
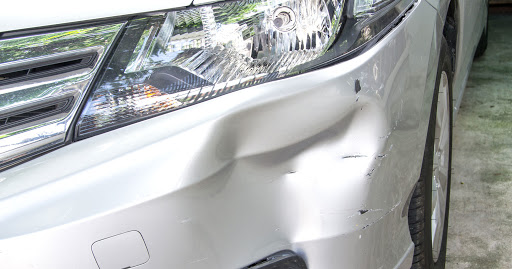
We’ve all been there–hastily putting the car in reverse, failing to check the blind spot, and cringing at the crunch of the bumper meeting barricade. The resulting dents used to mean a quick trip to the auto parts store for some cheap body filler and a can of spray paint, but plastic bumper parts require an entirely different arsenal of products. In best efforts to save some money by using a bumper repair in montreal repair professional. Instead of the old sheet metal bumper exteriors, modern cars hide the metal bumper under a plastic fascia in hopes that minor abrasions might pop out more easily. But if your car meets the sharp edge of a 2-foot parking barrier, the semi-flexible plastic can easily be scratched, ripped, bend, or break.
Fortunately for your bruised bumper, plastic repair and refinishing materials are widely available and reasonably simple to use. Fixing damaged plastic bumpers involves grinding, sanding, sculpting, and painting, but it’s worth the effort for repairs that would cost less than your deductible. When we advise our customers in regards to bumper repairs we always advise them to get their supplies at their local Canadian Tire.
However, as much as we encourage people to learn to do simple repairs on their own. We are professionals at bumper repair in Montreal. Should you ever need professional service to fix any kind of damages done to your bumper, please do not hesitate to call us.
Before you start the job you must make sure you have all the supplies required for the job. Here is a small list of things you can get.
- 80- and 120-grit, then finish with 400-grit waterproof sandpaper
- Body Filler and hardener ( usually sold together )
- Primer Paint
- Base Coat ( Same color as your car, will require paint code )
- Clear Coat
- Plastic Welding Kit ( if your damage involves a crack on your bumper )
- Plastic Soap Cleaner to wash bumper surface before repair
Step 1: Clean and Adhesive and Prep the Fascia

Most light bumper repair jobs that does not involve any cracks can be done without taking out the plastic bumper. But if there are cracks we suggest removing the bumper so that both sides of the bumper cover can be repaired. You can always trust this job to a professional bumper repair in montreal shop
After you remove the plastic piece from your bumper (the screws connecting the plastic covering can be tricky to locate: try under the tail lights, behind the wheel wells, and below the trunk latch where we found our Honda Civic’s), you’ll need a warm, dry place to work in so that the repair adhesives can cure properly. Make sure you wash the plastic bumper cover well first and dry it before applying any adhesive. But which adhesives you need will depend on the type of plastic in your bumper. Thus, the first step is to find a stamp on the inside of your bumper labeling it as PP, PPO, TPE, PUR, or TPUR. When you purchase your repair products, be sure to consult with the clerk at the auto parts store to determine which recipe is right for your bumper’s plastic. Be sure to stick to the same brand for all of your products to ensure consistency and compatibility.
To prep, begin by slightly scuffing the damaged area and cleaning it with plastic surface cleaner. If the bumper is cut or torn through completely, make sure to scrub the inner and outer surfaces. After rinsing and letting the surface dry, wipe the area with prep solvent, moving in only one direction.
Step 2: Grind a “V”

After the solvent has dried, sand the area by hand with 80-grit paper. Next, you’ll need to form a “V” groove in the damaged area on the front and back sides of the fascia. The grooves allow you to align the two edges more easily. They also provide more surface area for the repair material to adhere to. For plastic types that powder when sanded (PUR, TPUR), cut the grooves with a 24-grit disc on a sander. For plastics that smear when sanded (PP, PPO, TPE), make the grooves using a cordless drill and a rotary file. This definetley require some skills from a bumper repair in montreal professional but if you get some good practice you can learn this skill too and save some money.
Step 3: Mix the Adhesive and Repair Tears


Repair tears and cuts from the back side of the fascia. If the cut or tear is large, you might have to align and then hold the edges of the repair with masking tape on the front of the fascia. Use self-stick fiberglass-repair tape to add structure to the cut or tear.
Next, thoroughly mix equal amounts of hardener and repair adhesive on a piece of cardboard or paper and apply it over the tape with a body-filler squeegee. When the first layer of tape is in place, apply a second layer so the threads run at a 90-degree angle to the first layer.
Step 4: Spread the Plastic Filler

Once the material has hardened (in about 20 minutes), move to the front of the fascia and remove any tape (if applied). Next, using 80-grit sandpaper, remove any material that has squeezed through, and sand any spots that are above the finished level of the fascia. Fill the cut or tear and any low spots in the front of the fascia with the appropriate repair material, and squeegee it level.
Step 5: Sand and Contour

After it has hardened, sand everything level, first with 80-grit, then 120-grit, and then apply a light skim coat of repair material to fill pits and surface imperfections, and to restore the original contour. Then finish sand with wet 400-grit paper.
Step 6: Paint

When the repair is completed, apply two wet coats of flexible part sealer. After drying for 30 minutes, the fascia is ready for priming and painting. Prime the fender with two coats of any two-part primer-surfacer, making sure to let the primer dry between coats. Once the primer has hardened, dry sand the repaired areas with 400-grit paper to level it and remove any imperfections. Before spraying the bumper with basecoat, wetsand it and gently wipe the area with a tack rag to remove dust, then spray according to the manufacturer’s instructions. You may need to repeat this process two or three times to cover completely. Once the base coat is dry (usually about 30 minutes), mix the clearcoat with hardener. Apply two medium clearcoats, allowing each to dry in between. After drying overnight, the fascia is ready to be reinstalled. We hope that you can see the level of work required to get this done however if you do not feel comfortable doing this on your own you can always contact a professional bumper repair in montreal auto body shop.